Monday, November 28, 2011

The Chocolate Chip Cookie Strikes Back

Hearty Appletite's Chocolate Chip Cookie

For YEARS I have been on a quest to find the perfect chocolate chip cookie.  The cookie that is plump and chewy, and doesn't flatten once it cools.  The cookie you are proud to serve at church functions, PTA meetings, afternoon snacks, or dare I say it?...Dessert!  I have made dozens and dozens of recipes that promise to deliver such qualities, have pestered all my friends for their input, but still I've been disappointed.  I've tried melting my butter, whipping my butter, keeping my butter chilled in the fridge after each ingredient is added, decreasing the butter.  I was sure that the secret to success was within the preparation of the butter.  I'm here, as baking proof, that the secret is NOT in the butter (although I would still recommend using semi-cold butter).  My secret, my Cookie Monster friends, is in the eggs...or EGG, I should say.  While eggs usually add a chewiness and thickness to a baked good, they seem to only add more liquid in this cookie.

I'm here to offer you a recipe that I can boldly say will never fail you.  I'm so excited to have created such a chocolate chip cookie!!!  Having mastered this, everything else is pretty much "frosting." :)

Hearty Appletite's Chocolate Chip Cookie
3/4 cup chilled butter
2/3 cup granulated sugar
2/3 cup packed brown sugar
1 egg
1 teaspoon vanilla
2 1/2 cups UNsifted flour
1 teaspoon baking soda
1/2 teaspoon salt
1 cup chocolate chips

Combine the butter and sugars until fully incorporated, but not until whipped.  Add the egg and blend, then add the vanilla.  In a smaller bowl, mix together your dry ingredients, and then add to the wet ingredients.  If you're hand-mixing right now, your bicep may start burning.  The dough will be stiff and a bit dry.  Add the chocolate chips.  Form into 1.5" balls but do not flatten.  Bake on parchment lined paper for 8-10 minutes in a 375 F oven.

Just typing out this recipe makes me want to jump up and make a batch!  Let me know what you think!

From one hearty appletite to another...happy baking!

© Photography by Sandra Baumgarten

Faith Hill's Coca-Cola Cake

My rendition of Faith Hill's Coca-Cola Cake


I'm a big Faith Hill fan!  She's beautiful, talented, and seems like she'd be a great friend to take shopping, chat with over pedicures, or whip up something delicious together in the kitchen--I've heard she likes to bake.

Well, being that she has no idea that I even exist, I will settle for the next best thing and bake her Coca-Cola Cake, and watch her perform for "Christmas in Rockefeller Center" on Wednesday!


I had no plans to bake today, but when I saw this tempting recipe I swung by the store for the title ingredient before heading home.  It took me all of 10 minutes to throw the batter together, only two bowls to wash, and reminds me a lot of red velvet without the red dye :)  It's moist, it's fluffy, it's light in flavor...and OOOOH so yummy!!!

And now, Faith, I tip my cowgirl hat to you, and eat a bite in your honor.  But if you're feeling like a slice yourself, please stop by anytime!

So here's to happy holidays, delicious cakes, and singing from the Stars!  Enjoy!

Faith Hills' Coca-Cola Cake Recipe

P.S.  When I made these the first time, I used 1/4 cup chocolate chips in the icing since I was out of cocoa powder.  The second time I used cocoa powder.  I vote for the chocolate chip version!

© Photography by Sandra Baumgarten

Tuesday, November 22, 2011

Not Your Neighbor's Fudge!


The holidays are here and I couldn't be more pleased!  The days ahead will bring turkey and stuffing, fresh rolls, pies, and all of my favorite trimmings for Thanksgiving--the true kick-off to the Christmas season.  I can't wait to baste a turkey, humming along to the radio that plays Christmas songs 24/7.


In honor of all the festivities, I made fudge.  Nothing quite says Christmas like fudge.  Maybe that's why everyone makes it and gives it as a gift.  It's simply delicious, easy to make, and looks beautiful...well, does it look beautiful?  Fudge has always had a practical appearance to me.  A block of chocolate, wrapped in waxed paper and twisted on the ends.  You can buy it in candy stores this way, and this is how I've always seen fudge.  And, honestly, I've always been disappointed by store-bought fudge.  It tastes likes it's made with fillers like corn syrup or low-grade melting chocolate and tends to be a bit dry.


This year, I'm the neighbor making fudge, but this fudge is dressed up and ready to party alongside elegant grown-up desserts like truffles, opera cake and whipped mousses, and made with nothing but the finest ingredients!

In a 4 quart saucepot, add the milk, butter, salt and sugar.


Bring it to a rolling boil over medium heat for 5 minutes.  Don't skimp!  Stir constantly so avoid scorching the bottom.


Remove from heat and add the chocolate chips.  Tip:  when working with chocolate you never want to cook it.  Always use a double boiler or fold into a hot mixture that has been removed from the heat.


Add the marshmallow creme and vanilla!


It's usually about this point that I have to taste test...I can't resist!


Pour it into a waxed paper lined pan and chill.


Now it's time for your creatives juices take over and dress up your fudge!  I hand rolled some into balls and other pieces I cut into triangles.  Then I used crushed candy canes, chopped walnuts, edible pearls, and edible gold spray paint from Wilton's, but the sky's the limit with your candies!


Don't forget the shopping list!

7 oz. jar of marshmallow cream
1 1/2 c. sugar
2/3 evaporated milk
1/2 c. butter
1/4 t. salt
2 c. milk choc. chocolate chips
1 c. semi-sweet choc. chips
1 t. vanilla

Makes 2 1/2 lbs. fudge.


From one classical appetite to another...happy cooking!

© Photography by Sandra Baumgarten

Thursday, November 17, 2011

Pumpkin Pudding Cream Cheese Cake


Pumpkin Pudding Cream Cheese Cake

I am quite excited to be participating in improv cooking challenge hosted by Frugal Antics of a Harried Homemaker.  This is my first time creating a recipe, or entering a cooking challenge, for that matter.  When I found out that the two special ingredients were pumpkin and cream cheese, my mind filled with all sorts delicious ideas.  After contemplating pies, cakes and breads, and even soups, I decided that I wanted to use this opportunity to try something new.  In the wee hours of the morning, as I was up with our baby, inspiration hit, combining an old family recipe with a new twist...a pumpkin twist!  

A creamy bite of pumpkin pudding and whipped cream cheese

The creation???  Pumpkin Pudding Cream Cheese Cake!  I hope you enjoy this rich and decadent dessert as much as my family has!  Let me know what you think! :)


This is a layered cake, so we'll start off by baking a buttery, cookie crust, very similar to a Russian Tea Cake.


Combine the butter and the brown sugar in a bowl until well blended.  Add the crushed walnuts and vanilla, and then add the flour and mix in a mixer until crumbly.


Pour the mixture into a 9x9 oven safe dish...


Press down lightly, and bake in the oven at 400 for 10-12 minutes and light golden brown.


While the crust is baking and the warmth and smell of butter and sugar is filling the air, it's time to begin the creamy second layer of whipped cream and cream cheese!


In your stand alone mixer, or hand-held, mix together the whipping cream, sugar and vanilla until firm peaks form.  Don't over-mix or you'll have deliciously sweet butter for your dinner bread, but no filling for your cake!


Perfect!


Set aside the whipped cream to use in just a couple minutes.


Back to the mixer...No need to wash anything (unless you licked the whisk!) because the next mixture will fold together with the whipped cream.


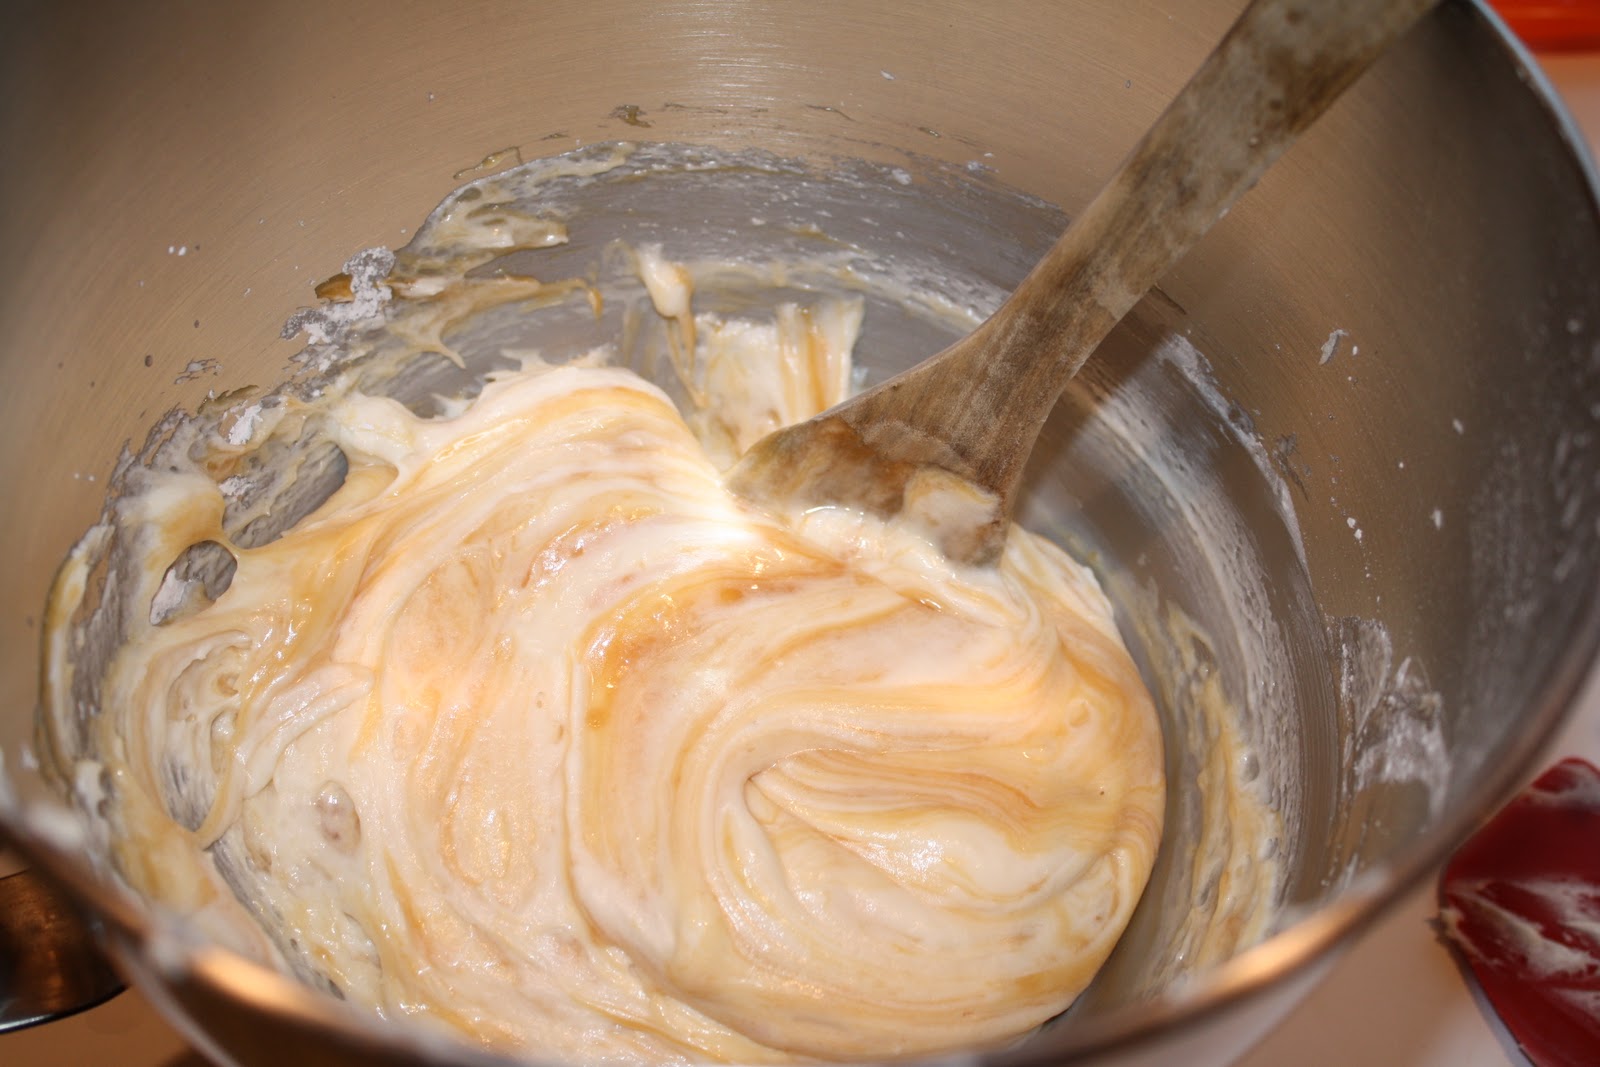
Cream together the cream cheese, powdered sugar, and vanilla until smooth.


Very gently, fold in the whipped cream.  Too much stirring will cause the whipped cream to fall, so resist the urge to make it completely uniform and allow it to look a little marbled.


To keep it cold while you work on the third layer, place it in a bowl, cover, and stick it in the fridge.


Now for the pumpkiny third layer!


In a 4 quart saucepot, stir together the sugar and cornstarch until there are no lumps.  This is very important for a smooth textured pudding.  Then add the dry spices, and stir.


Add the milk, stirring until the dry ingredients are suspended.  


Stir in one cup of pumpkin.


Cook over medium-high heat, stirring constantly, until the pudding begins to boil.  Stir two more minutes.  I like to use a whisk to stir because it scrapes the bottom continuously, preventing the milk from becoming scorched.


In a small dish, separate the yolks and discard the egg whites and "belly buttons" (see definition of this highly technical cooking term in Twix Pie recipe!)  


While stirring the eggs continuously, slowly add at least one cup of the hot pumpkin mixture to the eggs.  (This is an important step to avoid scrambling the eggs!)  Then add the egg mixture, back to the rest of the pudding and bring to a boil for one minute.  Remove from the heat, and add the vanilla and a spoonful of butter.


Transfer to a bowl and allow to cool completely.  Make sure to cover it with plastic wrap, and push the plastic all the way down to touch the pudding to prevent a film from forming on the pudding.


I'm thankful for these chilly fall days so that I can cool my baked goods outside instead of heating up my refrigerator with hot pies!


Time to assemble!  Spread the cream cheese mixture on the cooled crust.


Follow with the chilled pudding.


Almost there!


No pudding pie is complete without a dollop of homemade whipped cream on top!  Garnish with a dusting of ground nutmeg.


Enjoy!


Don't forget the shopping list!

Cookie Crust
1/2 cup butter
1 cup flour
1/4 cup brown sugar
1/4 cup chopped walnuts

Cream Cheese Layer
8 ounces cream cheese
3/4 cup powdered sugar
1 teaspoon vanilla
1 cup whipping cream

Pumpkin Pudding
2 cups milk
3/4 cup sugar
1/4 cup cornstarch
1 teaspoon cinnamon
1/2 teaspoon ginger
1/4 teaspoon cloves
3 egg yolks
1 cup pumpkin puree

From one hearty appletite to another...happy cooking!

© Photography by Sandra Baumgarten

Tuesday, November 15, 2011

Salted Caramel Chocolate Cake

Salted Caramel Chocolate Cake

I owe my interest and new love of salted caramel goodies to my mom.  Our favorite shop is a little store in Sellwood that sells Americana decor and gifts and it's a treat for us to get to go there.  It's on a street with other boutique type shops, trees lining the walk and very old homes.  It's fun to window shop up and down the streets, check out some antiques, all the while knowing that we will end our afternoon with a stop at Starbucks.

As we approached the Starbucks door, I saw their newest drink: Salted Caramel Mocha.  I'm a pretty adventurous coffee drinker but this flat struck me wrong.  "Oh, that looks gross," I blurted out.  To my utter amazement, my mom said, "I don't know.  I've heard really good things about them at work.  One girl says they're her favorite and she had to run in to get one when we had a break."  Now my mom has excellent judgment and good taste yet she only drink regular coffee, so this really made me think.  "Want to get one and split it?" she asked.  "Yes, yes I do!"  With the first sip, so began my new obsession of salted caramel and chocolate.  So in honor of the "Salted Caramel" lover in all of us, here's a recipe that's sure to please!  

We're going to start by assembling our ingredients for the milk chocolate cupcake with a dense, moist, rich texture.


In the double boiler, melt together the chocolate chips and butter until smooth.


Let the multi-tasker in you take over, and start whipping the eggs in a mixer.


This is going to take 5 minutes!  But look how beautifully yellow and frothy!


When the chocolate is melted, remove from heat and stir in the sour cream.  Then mix the chocolate into the eggs.


In a smaller bowl, combine all the dry ingredients and then add them into the wet mixture.


Pour 2/3 full into cupcake papers (makes about 18)


Bake at 350 for 20-25 minutes, until the center is set.


Now it's FROSTING time!  Back to the double-boiler...melt the caramels with 1 tbsp of milk.


While they're melting, head back to the mixer and whip together the butter, cream cheese, salt and vanilla.  Add powdered sugar alternately with 3 tbsps of milk.  When the caramel is melted, gently fold it into the buttercream, allowing it to remain swirled.


To assemble, frost the top of the cupcake with frosting, garnish with sprinkles of your choice, a light dusting of sea salt, a pinch of raw sugar, and top with a caramel!


Don't forget the shopping list!

Chocolate Cupcakes
12 ounces chocolate chips (I used half white and half semi-sweet)
1/2 butter
1/2 sour crea
1 cup sifted flour
1/2 teaspoon baking powder
1/4 teaspoon salt
4 large eggs
1/2 cup packed light brown sugar
1 teaspoon vanilla

Salted Caramel Buttercream
1/2 cup butter
3 ounces cream cheese
2 teaspoons vanilla
1/4 teaspoon salt
16 ounces powdered sugar
3 tablespoons milk
15 caramels, more for garnishing
1 tablespoon milk

From one classical appetite to another...happy cooking!

© Photography by Sandra Baumgarten