Tuesday, September 28, 2021

Asian Pear Tart with Pâte Brisée Filling


Our church has been continuing to bless us with fruit and today Asian pears got to take the spotlight. I've never baked with them before but my first thought was to make a tart. I made a rich pastry crust, filled them with a pâte brisée filling and topped them with Asian pear slices. Serve with a dusting of powdered sugar and enjoy!

God Bless,
Sandra xoxo


Rich Pastry Crust

1 1/2 cups all purpose flour
1/2 teaspoon salt
1/2 cup butter
1 egg
1-2 tablespoons milk

Stir together the flour and butter. Cut cold butter into the flour until mixture resembles course crumbs. Make a well in the center of the mixture and add one egg and one tablespoon milk. Slowly stir mixture together until it forms a ball. If necessary, add the additional tablespoon of milk. Divide the dough into four parts for individual shells or don't divide it for a 9" tart shell. Roll out the dough and press into tart shells. Prick the dough with a fork and/or use pie beads to keep the shells from bubbling. Bake at 350 F for 30 minutes.

Pâte Brisée (Almond Cream)

3/4 cup almond flour
3/4 cup powdered sugar
1 teaspoon cornstarch
1 teaspoon flour
3/4 cup butter, room temp
1 teaspoon vanilla
1 egg

In a small bowl, sift together dry ingredients. In a stand mixer, or hand mixer, cream together butter and vanilla until soft and fluffy. Add in dry ingredients. Add egg. 

Assembling

When the shells are done baking (should still be light colored), remove from the oven and fill with the almond cream. Arrange pealed and thinly sliced Asian pear slices on top. Bake at 325 F for 35-40 minutes or until the crust and filling are golden brown. 


Wednesday, September 22, 2021

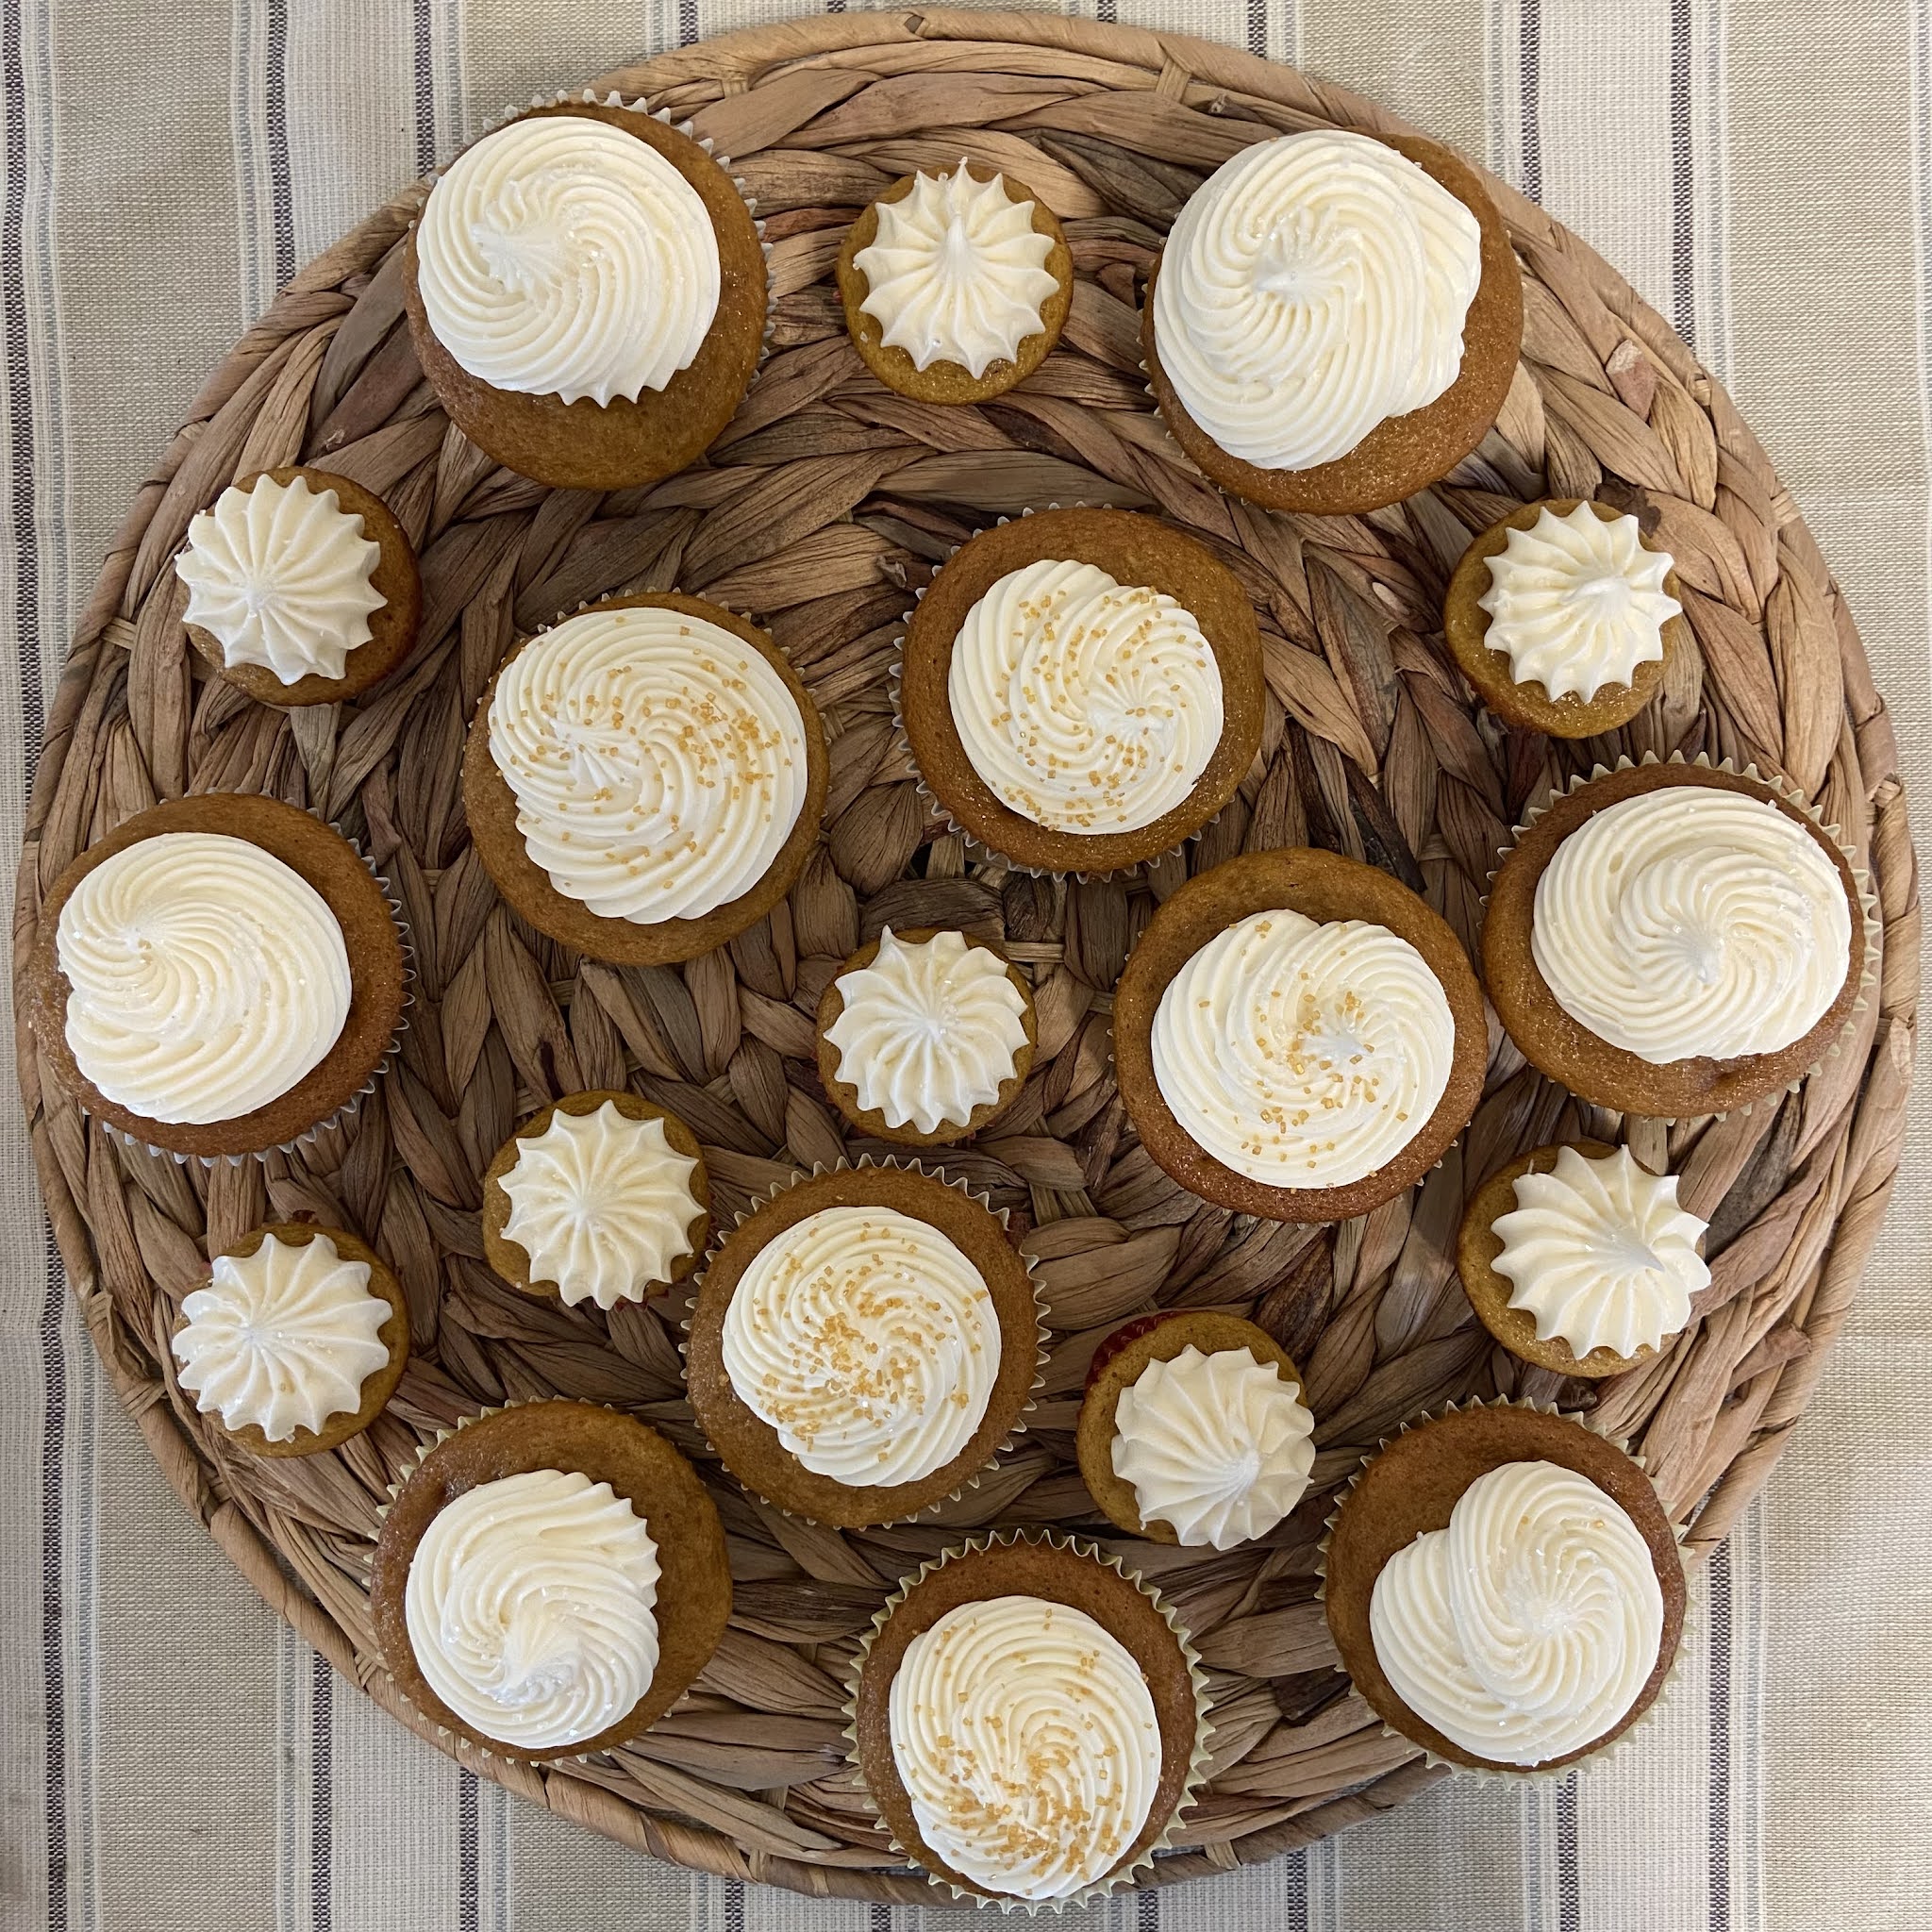
Pumpkin Cupcakes with Cream Cheese Frosting


I love everything about fall…the cooler weather, the candles, red and yellow leaves, and all the yummy goodness of spiced cakes and cookies! 

Our church’s ladies’ Bible study started this week which seemed like the perfect reason to whip of a batch of pumpkin cupcakes to share! I hope you enjoy them as much as we did…I mean, “they” did 😉

God Bless,
Sandra xoxo


Pumpkin Cupcakes

3 cups sugar
1 cup oil
4 eggs
2 teaspoons vanilla
3 1/3 cup flour
2 teaspoons baking soda
1 1/2 teaspoons salt
2/3 cup water
15 ounces pumpkin

In stand mixer, cream sugar and oil together, then add eggs, vanilla and pumpkin. In a small bowl, combine dry ingredients. Alternately, add flour mixture and water until all is gone. Grease a muffin pan, or use cupcake papers, and bake at 400° F for 15 minutes, or until an inserted toothpick comes out clean. This is a large batch so you will need to make several pans of cupcakes, or bake in a baking pan as a cake. 

Top with cream frosting!


Sunday, September 19, 2021

Sourdough Apple Spice Cake Roll


Nothing quite says fall like pumpkins...wait...apples! I saw this delicious recipe for a Sourdough Pumpkin Roll over at Farmhouse on Boone and I couldn't wait to make it. I've been making sourdough on a daily basis for a year now (see how to make sourdough starter here) and, as a person being gluten-free for 10 years, I've been able to tolerate wheat if it's fermented. So, this recipe appealed to me because of my love of pumpkin, fall, fermented wheat and all things delicious!


 I started making the recipe, only to realize that my new obsession with homemade pumpkin lattes had depleted my stash of pumpkin...sigh. But not to be discouraged, I did have applesauce on hand and so my pumpkin roll instantly became an apple roll, and who's to say it isn't every bit as delicious, or even more delicious, if you're in an apple-loving mood? 


I basically followed the recipe how it's listed, but since I was using applesauce instead of pumpkin, I scaled back the sugar a bit since apples are much sweeter. We try to stay away from overly sweetened foods to fine tune our taste buds to the richness of food in their natural state.

From our kitchen to yours, happy cooking!

             God Bless, 
                Sandra xoxo


            Apple Cake

            1 cup flour
            1/2 cup applesauce
            1/2 cup sourdough starter
            1 teaspoon cinnamon
            1/2 teaspoon salt
            3 eggs
            2 teaspoons vanilla
            1/3 cup maple sugar (or 1/2 cup regular sugar)
            1 teaspoon baking soda

Mix the first three ingredients together. Cover with a dishcloth and allow to ferment 12-24 hours. Add the remaining ingredients to the mixture and bake at 375 F on a parchment lined 10x15" baking sheet for 15 minutes or until done. 

As soon as it comes out of the oven, place a dish towel over the cake and flip the cake onto the towel being careful to not tear the cake.  Roll it up in the dishcloth until cool.

            Filling

            8 ounces cream cheese
            1/4 teaspoon butter
            1/4 cup maple syrup
            1 teaspoon vanilla

Cream together butter and cream cheese. Add in the maple syrup and vanilla. Unroll the cake and evenly coat the entire cake with the filling. Roll it back up. Sprinkle with powdered sugar and serve.

Thursday, September 16, 2021

Chocolate Mousse Domes


I have been binge watching Baking Championship shows, which I find so completely inspiring! On one of the episodes, they made mousse domes and I immediately knew I needed to make them. However, it wasn't immediately that I was *able* to make them. Fast forward nine months, and here they are!


        Cookies Base:

        56 g almond meal
        125 g flour
        75 g butter, softened
        75 g brown sugar
        1/2 tsp vanilla
        1 tbsp milk

Mix together and chill dough for 30 minutes. Using a lightly dusted working surface, roll out the dough to 1/4" thick. Cut out 12 circles the same size as the base of your mousse molds. Bake at 350 F for 8-10 minutes, or until light golden brown. Cool completely.  

Chocolate Mousse: 

        90 g milk
        90 g heavy cream
        4 eggs yolks
        190 g semi-sweet chocolate pieces
        1 package gelatin (7 g)
        35 g water
        100 g sugar
        50 g egg whites, whipped to stiff peaks
        150 g cold heavy cream, whipped to stiff peaks

Soften the gelatin in 35 g of cold water. Set aside. In a medium saucepan, bring the milk and cream to a soft boil. In a separate bowl, stir together the eggs. Slowly add the hot milk to the eggs while stirring constantly. Put the milk and egg mixture back in the saucepan and stir until thickened. Remove from heat and stir in the gelatin. Cool completely.

For the meringue, bring the sugar and water to a boil and cook over medium heat until it reaches the soft crack stage. Slowly incorporate the sugar mixture down the side of your mixing bowl, while continuously beating the egg whites at high speed. Mix until the meringue cools to room temperature.

Gently fold the whipped cream and meringue into the cool chocolate mixture. Lightly oil the silicone dome molds and fill with mousse. Freeze three hours.

Mirror Glaze recipe here. 

To assemble:

Top a small bowl with a cookie rack. Pop a mousse dome out of the mold and place it over a cookie base centered on the cookie rack above the bowl. Pour the cooled mirror glaze over the dome, allowing the excess to drip into the small bowl. Continue until all cookies are coated, reusing the extra mirror glaze as needed. Edge with chopped almonds if desired. Refrigerate until ready to serve. Enjoy!

Tuesday, August 24, 2021

Sourdough from Scratch


It's been about one year exactly since I became a true Sourdough. Sure, I grew up in Alaska where the people born there were referred to as Sourdoughs, but I began the process of fermented wheat for bread one year ago and I haven't looked back. It's easy. It's economical. It's good for you. But most importantly, it's delicious!!!

In my year of dabbling with sourdough, I feel my experience may be of value to other people not sure where to start. Every recipe and website said, "It's easy. It's not an exact science." But in my brain, I like to know EXACTLY what to do. I don't want to guess or just hope something turns out after I've invested my time and money into it. I want directions and I want them spelled out to me. So, here it goes...
Day one: Get a pickle jar or a glass container that will hold at least a quart. Add 100 grams of flour and 100 grams of water. Mix well. Cover with a wash cloth and place it on your countertop for 24 hours.

Now, why am I weighing this? Why not just say one cup of flour and one cup of water? Because in my experience, I tried the latter for 9 months and really wasn't happy with what was happening. Equal weight is much different than equal amounts. If you really must measure, then it's about 3/4 c of flour and about 1/2 c water!

Day Two: Mix up your flour/water concoction and throw away HALF down the sink. Add 100 grams water and 100 grams flour to the remaining "starter." Mix well, cover with a washcloth, and leave on your countertop for another 24 hours.

Day Three- Seven: repeat the steps in Day Two.

Day Eight: Your concoction is now a Sourdough Starter and ready to be used. 

To use your starter in baking: Use the amount of starter called for in the recipe. This is can also be called the "discard," because every day you need to throw away, or discard, about half of your starter and then feed it again with equal weight of flour and water.

Sourdough Bread
1 cup sourdough starter (or discard)
3 cups flour
1 1/4 cups water
2 teaspoons salt

Mix together ingredients in a mixer for 5 minutes or hand knead for 10 minutes. Grease a LARGE bowl and allow your dough to rise 8-24 hours, covered with plastic wrap. Don't forget to feed your starter.

Grease a bread pan with BUTTER or LARD (cooking sprays haven't worked for me). Gently handle your dough and shape it into a loaf. Place it in the bread pan to raise for two more hours.

Bake at 375 F for 30 minutes, then turn up the oven to 425 F and continue baking 15 minutes more. Once it's done, immediately butter all sides of the bread for a soft crust. 

Happy Baking!

God Bless,
Sandra xoxo


Saturday, November 4, 2017

Cranberry Pistachio Sugar Cookies


I saw a recipe for these cookies on a blog a few days ago, and they captured my fancy!  Christy, at The Girl Who Ate Everything says she found the recipe from Betty Crocker, but without her post, I wouldn’t have known that this gem of a cookie existed.  The color is light, yet noticeably green, with flecks of red cranberries so suitable for the holidays.  Plus, she gives great tips for shortcuts that will have these cookies gracing your table and palate with the ease you crave during this most busy time of the year!

I used a homemade dough for mine, reducing the sugar, and adding pistachio pudding mix.  So pretty, so yummy!

Don't forget the shopping list!

3/4 cup butter
2/3 cup sugar
2 eggs
3.4 oz box instant pistachio pudding
2 1/2 cups flour
1 teaspoon baking powder
1/2 teaspoon salt
1/3 cup craisins

Mix ingredients together and form into 1 1/2" balls.  Bake for 9 minutes at 400 F.

From one classical appetite to another...happy cooking!

Photograph © Sandra Baumgarten

Friday, October 12, 2012

Lobster and Shells


Lobster & Shells
I'm a big fan of Ina Garten from Barefoot Contessa, and I try to catch her show whenever I can.  Her recipes are easy, practical, and very do-able, yet look fancy enough to serve at any occasion.  She uses basic ingredients that are fresh and won't cost a fortune.  However, now that I say that, this recipe is for Lobster & Shells, and the lobster was too rich for my blood at $12.99/pound.  I opted for cocktail shrimp, and it was so tasty that I'm still blissfully unaware of what I missing!


I have to laugh when Ina says, "Use 'good' olive oil" or "use 'good' vegetables."  You can't very well put in poor quality ingredients and expect a gourmet meal, but I guess it's helpful to be reminded!


I really loved this pasta salad!  It was fresh and light, healthy, colorful, and easy to make!  

"It's important to use small shells so that the corn kernels can get stuck inside them." ~Ina Garten

From one hearty appletite to another...happy cooking!

Lobster & Shells from Barefoot Contessa's "How Easy Is That?" Cookbook
Kosher salt
Good olive oil
1/2 pound small pasta shells, such as Ronzoni
Kernels from 4 ears of corn (about 3 cups)
6 scallions, white and green parts, thinly sliced
1 yellow or orange bell pepper, seeded and small-diced
1 pint cherry tomatoes, halved
1 pound cooked fresh lobster meat (I used cocktail shrimp)
3/4 cup good mayonnaise
1/2 cup sour cream
1/4 cup freshly squeezed lemon juice (2 lemons)
3/4 cup minced fresh dill

Bring a large pot of water to a boil and add 1 tablespoon of salt and some olive oil.  Add the pasta and cook it for 8-10 minutes.  Add the corn to the pasta and cook it for another 2 minutes, until the corn is tender.  Drain the pasta and corn together in a colander and pour them into a large mixing bowl.  Add the scallions, diced pepper, tomatoes, and lobster, tossing gently to combine.  Allow to cool slightly.

In a small bowl, whisk together the mayonnaise, sour cream, lemon juice, 2 teaspoons salt, and 1 teaspoon pepper.  Cover with plastic wrap and chill for up to 6 hours to allow the flabors to develop.  Check the seasonings and serve chilled or at room temperature.


Sunday, September 30, 2012

Key Lime Cake

Key Lime Cake!
Birthday cakes rarely get "glamour shots" in our house because we're too busy celebrating to be taking pictures of what we're eating!  However, my sister got a shot of this most delicious key lime cake.  It was my grandmother's 88th birthday, and she loves key lime sweets.  I was inspired by her favorite candy--key lime truffles at See's Candies.

For this cake, I made a three layered vanilla cake with key lime curd filling and whipped cream frosting. The cake was moist--the key lime curd light and refreshing!  I would definitely make this again...maybe for Grandma's 89th?...I don't think I can wait a year! :)

From one hearty appletite to another... happy baking!

Vanilla Cake
1 1/4 cups butter, softened
4 eggs
3 3/4 cups all-purpose flour
4 teaspoons baking powder
3/4 teaspoon salt
2 1/4 cups sugar
1 tablespoon vanilla
1 7/8 cups milk

Allow butter and eggs to stand at room temperature for at least 30 minutes.  Grease and heavily flour three 8x1.5 - inch round cake pans.

In a large mixing bowl, beat butter with an electric mixer on medium to high speed for 30 seconds.  Gradually add sugar, beating on medium speed until well combines and scraping sides of bowl.  Beat on medium speed for 2 minutes more.  Add eggs one at a time, beating after each addition (about 1 minute total).  Beat in vanilla.  Alternately add flour mixture and milk to butter mixture, beating on low speed after each addition just until combined.  Spread batter into prepared pans.

Bake in a 375 degrees oven for 30-35 minutes or until a wooden toothpick inserted near centers comes out clean.  Cool layers in pans for 10 minutes.  Remove from pans and cool thoroughly.

Key Lime Curd
1/2 cup sugar
1 tablespoon cornstarch
1 1/2 teaspoons finely shredded lime peel
3 tablespoons key lime juice
3 tablespoons water
3 beaten egg yolks
1/4 cup butter, cut up

In a medium saucepan stir together sugar and cornstarch.  Stir in lim peel, lime juice, and water.  Cook and stir over medium heat until thickened and bubbly.  Stir half of the lime mixture into egg yolks.  Return the egg yolk mixture to the saucepan.  Cook and stir over medium heat until mixture comes to a gentle boil.  Cook and stir for 2 minutes more.  Remove from heat and add butter.  Stir and cover.  Cool at least one hour before using.

Whipped Cream Frosting
1 cup whipping cream
2 tablespoons sugar
1 teaspoon vanilla

Beat whipping cream, sugar and vanilla with an electric mixer on medium speed until soft peaks form.

To assemble, lay down first vanilla cake and top with half of the key lime curd.  Stack second cake on the curd, and top with the remaining curd.  Add third cake and top with whipped cream frosting.  Garnish with additional lime zest, if desired.  Keep assembled cake refrigerated until time to serve.  Will keep for up to 24 hours, if you don't eat it before then!


Tuesday, August 7, 2012

Chocolate Marbled Cheesecake

Creamy, mousse-like, melt-in-your-mouth chocolate and vanilla swirled cheesecake!

It's Crazy Cooking Challenge time again, and there was no arm twisting involved for me to participate: CHEESECAKE!!!

This cheesecake is fancy enough to impress all your guests, yet it's a snap to make.  I made and ate it with a 20 month sitting on my hip the whole time.


As I've mentioned, I'm not fond of graham cracker crusts, so I used a buttery, flakey, brown sugar shortbread crust = perfection! =)


From one hearty appletite to another...happy baking!!!

Chocolate Marbled Cheesecake from Better Homes and Gardens
3 8-ounces packages cream cheese, softened
1 cup sugar
2 tablespoons all-purpose flour
1 teaspoon vanilla
1/4 cup milk
3 slightly beaten eggs
4 ounces semisweet chocolate pieces, melted

Crust, family recipe
1/2 cup butter
1/4 packed brown sugar
1 cup unsifted flour

Heat oven 375 F.  Combine all ingredients for the crust and bake in a 9" springform pan for 11-12 minutes.  The crust will not be cooked all the way (do NOT overcook!).  Place the chocolate pieces in an oven-safe bowl and melt in oven the last 5 minutes.

For filling, in a large mixer bowl beat cream cheese, sugar, flour, and vanilla until combined.  Stir in milk and eggs until smooth.  Pour half the filling in partially baked crust.  Mix in melted chocolate to the rest cream cheese mixture.  Pour on top of the vanilla mixture and gently swirl 2-3 times with knife, but resist the urge to mix :)  Bake for 40-45 minutes, until the outside edge appears set when gently shaken.  (An inserted knife will NOT come out clean, but the cheesecake is done!)  Enjoy!

Wanna join the fun?  Head over Tina's by following the link on the button!


Photobucket

Wednesday, August 1, 2012

From Your Garden, To Your Table: Margarita Pizza

Hot from the oven!

Light, fresh, and easy!  Margarita pizza is one of my favorite summertime meals.  I just love that half the ingredients can be found in my garden, and the other half I can throw together quite easily with fresh ingredients.  All you need are fresh basil leaves, fresh tomatoes, fresh mozzarella, pizza sauce and dough!


I made these "personal pan" size so that everyone could make their own to their liking!


Fresh mozzarella makes all the difference!  Trust me and use it =)  I've heard that it's fairly easy to make at home, so I might have to tackle that in the near future.  Enjoy!!!


From one hearty appletite to another...happy cooking!

My favorite pizza dough recipe:

4 cups flour
1 teaspoon salt
2 teaspoons baking soda
2 tablespoon olive oil
1/2 teaspoon yeast
1 1/2 cups water

Mix all ingredients together and let rest 30 minutes.  Roll out, top with sauce and toppings, and cook on lowest baking rack at 425F for 18-20 minutes, or until cheese is browned.

Saturday, July 28, 2012

S'more, S'mores please!


My family loves to go camping, and no trip is complete without s'mores!  I always buy a bag of marshmallows, a box of graham crackers, and several Hershey's bars, but I'm not a huge fan of them.  I usually feel over-sweeted...is that possible?...after eating them.  UNTIL NOW! :)  A word to the wise...after making these, you will never want store-bought fixin's again!


I tackled my fear of making marshmallows by using Martha Stewarts super easy marshmallow recipe...


then hopped over to Smitten Kitchen for her delicious homemade graham crackers!  

Buttery, and slightly chewy homemade graham crackers!

The marshmallows melt into a soft creaminess!
From one hearty appletite to another...happy baking!

Monday, July 16, 2012

Chi Chi Dango Mochi

Soft and chewy Chi Chi Dango Mochi

I’m a huge fan of the new frozen yogurt places that are popping up everywhere, and one topping that I see at all the places is Mochi, a soft and chewy Japanese candy.  It’s like a thick gel, gummy treat, but it isn’t like a jelly bean that is forever stuck in your teeth.  It has a mildly sweet rice flavor, that isn’t overwhelming as a topping yet is perfectly delicious on its own--I should know...I’ve eaten LOTS! :)

I found this recipe for Chi Chi Dango Mochi, and decided to give it a go!  I took the hints given in the comments, and it turned out perfectly.  I had to laugh when the recipe said, "Don't double it," because there's MORE THAN ENOUGH in a single recipe.  I got three big bowls full.


A great treat for lunches that easily packs along!

From one hearty appletite to another...happy baking!

Chi Chi Dango Mochi
1 pound mochiko (glutenous rice flour)
2 1/2 cups white sugar
1 teaspoon baking powder
2 cups water
1 teaspoon vanilla extract (I'd suggest 2 teaspoons because I didn't even notice just 1 tsp.)
1 (14 ounce) can coconut milk
1 1/2 cups potato starch

Preheat oven to 350 degrees F (175 degrees C). Grease a 9x13 inch pan. Whisk together the rice flour, sugar and baking powder; set aside.

In a medium bowl, mix together the water, vanilla, and coconut milk.  Blend in the rice flour mixture.  Pour into the prepared glass pan.

Cover the pan with foil and bake for 1 hour.  Allow to cool completely.

Turn the pan of mochi out onto a clean surface that has been dusted with potato starch.  But into bite size pieces using a plastic knife.  The mochi does not stick as much to plastic knives.

*Tips:  take the mochi out after one hour, whether it looks done to you or not.  It IS done :)  Over-baking will cause it to be dry and tough.

Photograph © Hearty Appletite


Tuesday, June 26, 2012

Oh My! Strawberry Pie!

Strawberry Pie!
Strawberry Pie is one of my all-time favorite pies!  It's not just a pie, but a significant milestone in the calendar year.  It means that summer is here, berry season is upon us, and we can go out to the fields with our berry buckets to stock our freezers with a taste of summertime!


A quick rinse to make sure there's no dirt, or little critters!


The great thing about this pie is that it's easy, takes only a few ingredients and can be made really quickly.  Plump, juicy strawberries, dripping with flavor and naturally vibrant.  There's nothing better!

Add a dollop of whipped cream!

Add a fork, and you're ready to go!  Yummm!
Fresh Strawberry Pie
6 cups fresh strawberries, frozen do not substitute
2/3 cups sugar
2 tablespoons cornstarch
2/3 cup water

In a saucepan, mash one cup of berries.  Combine the cornstarch and water until well blended, and add to the crushed strawberries.  Cook and stir over medium heat until misture is thickened and bubbly.  Cook one minute.

Spread about 1/4 of the glaze over bottom and sides of crust.  Arrange strawberries and add remaining glaze over the top, taking care to cover each berry.  Chill for 1 hour.  Top with whipped cream and serve.

Shortbread Crust
1/2 butter, slightly softened
1 cup unsifted flour
1/4 cup brown butter
1/2 teaspoon vanilla

Mix together until crumbly.  Press into 9" pie pan and bake at 350 F for ~16 minutes, or until light golden brown.

Photograph © Hearty Appletite

Saturday, June 9, 2012

DIY Drumstick Ice Cream


                                               I scream,                            You scream,                        We all scream for ice cream!!!


My kids introduced me to Drumstick Ice Cream Cones last summer.  I had spent my whole life, blissfully unaware of the deliciousness of boxed ice cream cones, due to the name of them.  When I hear "drumstick," my mind goes to poultry, not creamy ice cream, dipped in melt-in-your-mouth chocolate, topped with sprinkles.


After polishing off a box of them...the whole family, not just me!... I decided it would be fun to make our own.  I made the "magic shell" chocolate coating from chocolate chips and coconut oil, and rolled it around the inside edges of the cones.  (I kept all the cones in the freezer if I wasn't working with them that second). After the chocolate hardened (happens quickly in the freezer), I filled them up with slightly softened vanilla bean ice cream, dunked them back in the chocolate sauce, and quickly doused them with sprinkles before they froze.


From one hearty appletite to another...happy baking!

DIY Drumstick Ice Cream Cones
One package sugar ice cream cones
Half gallon of your favorite ice cream
1 cup of chocolate chips
2 tablespoons coconut oil

Photograph © Hearty Appletite

Tuesday, June 5, 2012

Peanut Butter Chocolate Chip Cookies


I can only be thankful that my husband doesn't love these cookies, because that means ALL THE MORE FOR ME! :)  This is the best recipe for peanut butter cookies that my family has ever found, and it's no longer in print.  It comes from the original 1963 Betty Crocker's Cooky Book.  There's a new edition of the old book, but they've slightly changed some of the recipes.  Not cool.  Anyway, you won't find fault with these!


Hot from the oven!


Thick and chewy, yet delicately buttery :)  Enjoy!


From one hearty appletite to another...happy baking!

Peanut Butter Cookies, adapted from Betty Crocker's Cooky Book 1963
1/2 cup butter
1/2 cup peanut butter
1/3 cup sugar
1/3 cup packed brown sugar
1 egg
1 1/2 cups flour
1/2 teaspoon baking powder
3/4 teaspoon baking soda
1 cup chocolate chips (optional)

Mix butter, peanut butter, sugars and egg thoroughly.  Measure flour by dipping method.  Blen all dry ingredients; stir into butter mixture.  

Heat oven to 375 F.  Roll dough in 1 1/4" balls.  Place 3" apart on lightly greased baking sheet.  Flatten slightly crisscross style with fork tongs.  Bake 9-10 minutes.